Cinnamon Swirl Pancakes

Friday, November 2, 2012


I had many days off of school this week due to Hurricane Sandy, and by the second day of not having school or dance the boredom was really starting to sink in.


It was tuesday morning and my friend Ben was at my house, he told me he was hungry, and boy did I jump on that opportunity, because whats a better cure for boredom than eating!?


These pancakes are sugary heaven in every bite. Now mine didn't quite come out like Erica's did which is kind of disappointing, but what they lacked in appearance they made up for in flavor.


I don't know why but when I tried to put the cinnamon sugar swirl in them it just ended up cooking funky. I also burnt the icing the first time I tried to make it, but I wasn't discouraged it just made my day more interesting.


Regardless of everything that went wrong though, these pancakes were still amazing, gooey, and fluffy just like they should be!


Ingredients:

for the cinnamon swirl:
4 tbsp unsalted butter, melted
1/4 cup + 2 tbsp light brown sugar
1/2 tsp cinnamon
for the cream cheese glaze:
4 tbsp unsalted butter
2 oz cream cheese, at room temperature
3/4 cup powdered sugar
1/2 tsp vanilla extract
for the pancakes: (I used Bisquick instead)
2 cups all purpose flour
2 tbsp granulated sugar
1 tsp baking powder
1/2 tsp baking soda
1/2 tsp salt
1/4 tsp cinnamon
2-1/4 cups buttermilk
1/4 cup sour cream
2 eggs
3 tbsp unsalted butter, melted and cooled slightly
for the cinnamon filling:
- In a medium bowl, combine the butter, brown sugar, and cinnamon. Transfer the mixture to a piping or ziploc bag and set aside.
for the cream cheese glaze:
- In a small pan, heat the butter on low until melted. Once melted, whisk the cream cheese into the butter until smooth. Sift the powdered sugar into the pan and stir. Add vanilla extract and set aside.
for the pancake batter:
- In a large bowl, whisk together the flour, sugar, baking powder, baking soda, salt, and cinnamon.
- In a separate medium bowl, combine buttermilk, sour cream, eggs, and melted/cooled butter.
- Make a well in the center of the dry ingredients and pour in the wet. GENTLY combine the ingredients until just combined. Allow batter to sit for 10 minutes before cooking.
- Heat 1 tsp of vegetable oil over medium heat until shimmering. Using a paper towel, carefully wipe out oil, leaving a thin film of oil.
- Using a 1/4 cup measure, portion batter into pan and reduce oil to medium low. Make sure the cinnamon mixture is ready by using your hands to re-incorporate the butter into the sugar. Snip the corner of the cinnamon mixture bag and when the pancake begins to form bubbles, add the filling. Start at the center of the pancake and form a swirl.
- Cook the pancake 2-3 minutes more until the bubbles being popping and it's golden brown on the other side.
- Use a large metal spatula to slip underneath the pancake and carefully but quickly flip it over. Cook an additional 2-3 minutes. When you flip the pancake onto a plate, you'll see the beautiful cinnamon swirl that's melted itself into the batter.
- Wipe the pan with a paper towel to clean it a bit, and repeat with remaining pancake batter and cinnamon filling. Rewarm the glaze briefly if needed and drizzle lightly over plates of pancakes. enjoy!

Mummy Hot Dogs


I know Halloween was two days ago but because of everything that happened with Hurricane Sandy I didn't really get to celebrate it. So rain or shine (mostly rain though) Halloween will be acknowledged! 


So today I've got a quick, simple recipe, that is oh so adorable and oh so delicious! Mummy hot dogs!


They only require three ingredients and are so cute for the holiday. My entire family loved them even my tough Dad ate three! I strongly recommend these even if it isn't Halloween anymore, they are awesome. And Happy late Halloween!

Ingredients:

recipe not adapted at all from Damn Delicious

  • 1 (8-ounce) tube crescent rolls
  • 8 hot dogs
  • Mustard, for garnish
Preheat oven to 375 degrees F. Line a baking sheet with parchment paper or a silicone baking mat; set aside.
Roll out the crescent rolls into one sheet, placing 2 triangles together by pinching the seams to make a square. Using a pizza cutter or sharp knife, cut each rectangle into 6 strips.
Wrap 3 strips around each hot dog, leaving a little space at the top for the “eyes.”
Place into oven and bake until golden brown, about 20 minutes. 
Let cool 5 minutes before adding dots of mustard for the “eyes.” Serve immediately.

Apple Pie

Saturday, October 27, 2012

I used to think that everyone in the universe enjoyed pie, I mean whats not to love? But recently I have run into many people that do not in fact like pie...what is this madness!? PIE IS DELICIOUS! But to each there own, I shall not hate on you for not liking pie.


I'm sure you can tell that I do not share these crazy peoples point of view. I happen to LOVE pie, like a lot! So I made a pie for you guys this week, apple pie to be specific and it was delicious as usual.


I'm well aware that thanksgiving is coming up very shortly (another thing people have been telling me they don't like. What is happening people?!) and that means pies, pies, and more pies.


So I celebrated all the pies I am about to eat by making pie. I'm very clever I know. But in all seriousness this pie was very delicious and I even made the crust from scratch and I was very proud of myself for that, because I have never attempted that before.


I did however get a little confused while reading the directions and accidentally put  an egg in my apple filling and almost broke down crying. I thought I had ruined the entire thing but I was so determined that I put that pie in the oven anyways and it actually turned out fine. But everyone I don't suggest this just make it like a normal apple pie. So enjoy your pie everyone, and as me and my nanny always say "to pie or not to pie...that is the question."

Ingredients:

For the Crust:
2 1/2 cups unbleached all-purpose flour
1 teaspoon salt
2 tablespoons sugar
12 tablespoons unsalted butter, chilled, cut into 1/4-inch pieces
10 tablespoons ice wate

1. Pulse flour, salt and sugar in a food processor fitted with steel bald until combined. Add shortening and process until mixture has texture of coarse sand, about 10 seconds. Scatter butter pieces over flour mixture; cut butter into flour until mixture is pale yellow and resembles coarse crumbs, with butter bits no larger than small peas, about ten 1-second pulses. Turn mixture into medium bowl.
2. Sprinkle 8 tablespoons ice water over mixture. With blade of rubber spatula, use folding motion to mix. Press down on dough with broad side of spatula until dough sticks together, adding up to 2 tablespoons more ice water if it will not come together. Divide dough into two pieces, one slightly larger than the other. (If possible, weigh pieces. They should register 16 ounces and 14 ounces.) Flatten larger piece into a rough 5-inch square and smaller piece into a 4-inch disk; (If for a non-lattice, double crust pie, these pieces should be even in weight and both round) wrap separately in plastic and refrigerator at least 1 hour or up to 2 days before rolling.

For filling:
1 1/2 pounds Granny Smith apples (about 3 medium)
2 pounds McIntosh apples (about 4 large)
1 tablespoon juice and 1 teaspoon zest from 1 lemon
3/4 cups (5.25 ounces) plus 1 tablespoon sugar
2 tablespoons all-purpose flour
1/4 teaspoon salt
1 teaspoon cinnamon
1/4 teaspoon ground nutmeg
1/4 teaspoon ground allspice
1 egg white, beaten lightly


1. Adjust oven rack to lowest position and heat rimmed baking sheet and oven to 500°F. Remove one piece of dough from refrigerator (if refrigerated longer than 1 hour, let stand at room temperature until malleable).
2. Roll dough on lightly floured work surface or between two large sheets of plastic wrap to 12-inch disk. Transfer dough to pie plate by rolling dough around rolling pin and unrolling over 9 1/2-inch pie plate or by folding dough in quarters, then placing dough point in center of pie plate and unfolding. Working around circumference of pie plate, ease dough into pan corners by gently lifting dough edges with one hand while pressing around pan bottom with other hand. Leave dough that overhangs lip of plate in place; refrigerate dough-lined pie plate.
3. Peel, core and cut apples in half, and in half again width-wise; cut quarters into 1/4-inch slices and toss with lemon juice and zest. In a medium bowl, mix 3/4 cup sugar, flour, salt and spices. Toss dry ingredients with apples. Turn fruit mixture, including juices, into chilled pie shell and mound slightly in center.
4. Roll out second piece of dough to 12-inch disk and place over filling. Trim top and bottom edges to 1/2-inch beyond pan lip. Tuck this rim of dough underneath itself so that folded edge is flush with pan lip. Flute edging or press with fork tines to seal. Cut four slits on dough top. If pie dough is very soft, place in freezer for 10 minutes. Brush egg white onto top of crust and sprinkle evenly with remaining 1 tablespoon sugar.
5. Place pie on baking sheet and lower oven temperature to 425°F. Bake until top crust is golden, about 25 minutes. Rotate pie and reduce oven temperature to 375°F; continue baking until juices bubble and crust is deep golden brown, 30-35 minutes longer.
6. Transfer pie to wire rack; cool to room temperature, at least 4 hours.

Recipe barely adapted from Smitten Kitchen


Chicken and Sausage Gumbo

Sunday, October 14, 2012
Gumbo, gumbo, gumbo! I have never actually had gumbo before, until this weekend that is. I was a little nervous to try it because, have you looked at okra?! Scary stuff! But let me tell you, I. Am. Sold. Oh my gosh gumbo is delicious!


My friends were coming over for a movie night and I was trying to pick something to make. I wanted it to kind of be fall themed so I was looking for some kind of soup or stew. When I stumbled upon this lovely recipe I knew it was a gamble but I hadn't come up with anything else so I just said "what the hey!"


This recipe was a little funky and at times I wasn't sure if it was going to work or not. We were about ready to give up and order pizza, but I was determined to see it through until the end.


 Boy am I glad that I did because it was well worth it. Okra was not as scary or weird as I thought it was going to be, in fact I rather like it!


So be a little adventurous and take a risk on this chicken and sausage gumbo, the sausage is to die for ;)

Ingredients:

  • 1 1/4 cups rice (I used white rice)
  • 2 tablespoons all-purpose flour 
  • 1 tablespoon vegetable oil 
  • 1 cup frozen chopped onion
  • 1 cup frozen chopped green bell pepper
  • 1 cup frozen cut okra
  • 1 cup chopped celery 
  • 1 teaspoon bottled minced garlic
  • 1/2 teaspoon dried thyme
  • 1/4 teaspoon ground red pepper
  • 2 cups chopped roasted skinless, boneless chicken breasts (about 2 breasts) 
  • 8 ounces turkey kielbasa, cut into 1-inch pieces
  • (14 1/2-ounce) can diced tomatoes with peppers and onion (this actually exists!)
  • (14 1/2-ounce) chicken broth 
  1. Cook rice according to package directions.
  2. While rice cooks, combine flour and oil in a Dutch oven; saute over medium-high heat 3 minutes (it will get clumpy and weird just go with it). Add onion and next 6 ingredients (onion through red pepper); cook 3 minutes or until tender, stirring frequently. After about a minute and a half add some chicken broth to the pot so the ingredients don't burn.
  3. Stir in chicken, kielbasa, tomatoes, and broth; cook 6 minutes or until thoroughly heated. Serve over rice.

Pumpkin Pie Bread

Sunday, September 30, 2012

I told you I had Pumpkin everything for you today and my wonderfully delicious second recipe is Pumpkin Pie Bread! Banana bread is a favorite in my household especially chocolate chip banana bread. So when I saw this recipe I knew it would be instant love.


Now let me tell you, the aroma in the kitchen while you make this loaf of lovely is insane! Everything smells like pumpkin and cinnamon and the holidays. Ooohhhh I love it so much! How can you not love the warm feeling of the holidays its just not possible!


Now I know I'm getting ahead of myself, "Christmas is like 3 months away Daphne!" is probably what you're saying to me right now, but that's how much I love christmas. I have to start planning 3 months ahead of time, it's a necessity for me! So fill your house with the smell of pumpkin and spices, and eat some delicious fall food.

Ingredients: 

1 1/2 + 1/4 cups all-purpose flour
1 teaspoons baking soda
1/2 teaspoon baking powder
1 1/2 teaspoons pumpkin pie spice
1/2 teaspoon salt
1 1/2 cups white sugar (told you it had some calories!)
1/2 cup vegetable oil
2 eggs
1/2 (15 ounce) can pumpkin puree
1/4 cup water

Preheat oven to 350 degrees F. and grease two 9x5 inch loaf pans.

Sift together the flour, baking soda, baking powder, salt, and pumpkin pie spice. Set aside.

In a large bowl, beat together sugar, oil, eggs, and pumpkin. Stir in flour mixture alternately with water.

Divide batter evenly between the pans and bake for 60 to 70 minutes (or until it passes the toothpick test)

For best flavor, store wrapped in plastic wrap at room temperature for a full day before serving.
recipe adapted from here

Pumpkin Kiss Cookies


I'm back! Sorry it has taken me so long to post something I got so wrapped up in everything that I didn't even have a spare second to breathe! But I had all today to whip up something delicious, and not only do I have one recipe for you, I've got two!


The holiday season is my absolute favorite thing in the world! I love it even more than chocolate itself (I know it's a sin)! Anyone who knows me knows that I live by christmas. So in order to kickstart the fall and the beginning of the holiday season I made pumpkin everything!


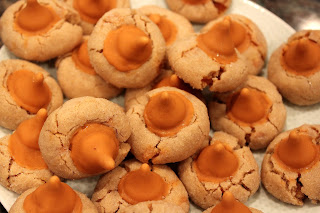
These Pumpkin Kiss Cookies are surprisingly delicious, I say surprising because I don't really like pumpkin pie spice hershey kisses all that much. I saw this recipe and really wanted to make it, so I got the hershey kisses and when I tried one of them they were really sweet. But something happens when you put these little kisses in a cookie and they magically taste amazing!


Don't let these cookies fool you, they may be tiny but they pack a punch! I have to say I'm a huge fan of the original Hershey Kiss cookies and now I am a huge fan of the pumpkin version. So welcome in the season with these goodies, it's a little bit of fall in every bite.

Ingredients: makes about 20-25 cookies: 

recipe barely adapted from here
3/4 cup icing sugar
1/2 cup + 2 tablespoons unsalted butter, at room temperature
1 teaspoon vanilla extract
1/2 a large egg (whisk one egg in a small bowl, then divide equally in half and only use one alf)
1-1/2 cups all-purpose flour
1/2 teaspoon baking powder
1/2 teaspoon cinnamon
1/2 teaspoon pumpkin pie spice
1/4 teaspoon salt
1/4 cup finely chopped Pumpkin Spice flavored Hershey's Kisses (about 10 Kisses)
granulated sugar for coating
additional unwrapped Pumpkin Spice Kisses - about 25

Preheat oven to 350°F. Make room in either the refrigerator or freezer for your cookie sheet. Place the 25 or so unwrapped Kisses you’ll be using for topping the cookies in the freezer so that they won’t melt as quickly when added to the hot cookies later.

In the bowl of an electric mixer, combine icing sugar, butter, vanilla, and egg. Beat at medium speed, scraping the bowl often, until creamy (about 2-3 minutes).

In a separate medium bowl, whisk together the flour, baking powder, cinnamon, pumpkin pie spice, and salt. Add the dry ingredients to the wet ingredients in the electric mixture in two additions, mixing well after each addition, until well blended. Stir in chopped Kisses. If the Kisses are too soft to chop, put them in the freezer until they’re firm enough to chop into small pieces, then add to the batter.

Shape the dough into 3/4-inch to 1-inch balls. Pour some granulated sugar in a shallow bowl or plate and roll the balls in the sugar to coat them on all sides. Place the balls one inch apart on a cookie sheet lined with parchment paper. Bake for 10-12 minutes or until set.

While the cookies are baking, remove your Kisses from the freezer and unwrap them. As soon as the cookies come out of the oven, gently press a Kiss onto the center of each cookie. The cookies will crack a little around the edges so use your fingers to hold the cookie together as you press the Kiss on top. Immediately transfer the cookie sheet (with cookies) to the freezer (preferred) or refrigerator so that the Kisses won’t start melting and will hold their shape.

Remove from freezer once Kisses are set, and store in a covered container at room temperature. Enjoy!

Minestrone

Thursday, September 20, 2012

I love soup. I have been dying to make soup for SO long, but who wants to eat hot soup in the middle of the scorching summer? So I patiently waited for the right opportunity to come along, and since it has been getting colder recently, as fall quickly approaches, I caved and made myself some soup.


I was originally going to do a post about these really cool chocolate peanut butter whoopie pies, but as I say in my "about" section, I do make mistakes because I am very inexperienced, and I burned the cookies and the filling curdled. So I chucked it out and settled for soup. "Settled" being a terrible term for this soup because it is me and my mom's absolute all time favorite soup!


It's also perfect because it's one of the few recipes that my entire family can enjoy, so I don't have to make 3 different entree's! It is one of those really comforting soups that you just want to curl up with and watch a good movie.


And that is exactly what I did. It's also really great for leftovers, I brought it to school for lunch the next day! So go forth soup lover's of the world, the temperature is dropping and it is time for soup season!

Ingredients:

·       2 teaspoons olive oil 
·       1 cup chopped onion 
·       2 teaspoons chopped fresh oregano
·       4 garlic cloves, minced 
·       3 cups chopped yellow squash
·       3 cups chopped zucchini
·       1 cup chopped carrot 
·       1 cup fresh corn kernels (about 2 ears) 
·       4 cups chopped tomato, divided 
·       3 (14-ounce) cans fat-free, less-sodium chicken broth, divided 
·       1/2 cup uncooked ditalini pasta (very short tube-shaped macaroni) (I used elbow macaronie/pasta)
·       1 (15.5-ounce) can Great Northern beans, rinsed and drained
·       1 (6-ounce) package fresh baby spinach
·       3/4 teaspoon salt 
·       1/2 teaspoon freshly ground black pepper 
·       1 cup (4 ounces) grated Asiago cheese 
·       Coarsely ground black pepper (optional) 

  1. Heat oil in a Dutch oven over medium-high heat. Add onion to pan; sauté 3 minutes or until softened. Add oregano and garlic; sauté 1 minute. Stir in squash, zucchini, carrot, and corn; sauté 5 minutes or until vegetables are tender. Remove from heat.
  2. Place 3 cups tomato and 1 can broth in a blender; process until smooth. Add tomato mixture to pan; return pan to heat. Stir in remaining 1 cup tomato and remaining 2 cans broth; bring mixture to a boil. Reduce heat, and simmer 20 minutes.
  3. Add pasta and beans to pan; cook 10 minutes or until pasta is tender, stirring occasionally. Remove from heat. Stir in spinach, salt, and 1/2 teaspoon pepper. Ladle soup into individual bowls; top with cheese. Garnish with coarsely ground black pepper, if desired.